Master Easy Garlic Peeling: Quick Methods for Hassle-Free Cooking
Garlic is a culinary cornerstone, providing an incomparable punch of flavor that elevates countless dishes, from savory stir-fries and hearty soups to aromatic marinades and rich sauces. But let's be honest: while we can't live without its pungent charm, the act of peeling garlic can often feel like the most frustrating part of meal prep. Those thin, papery skins cling stubbornly, making the process messy, time-consuming, and surprisingly arduous.
If you've ever wrestled with a particularly uncooperative clove, you're not alone. The good news is that mastering the art of garlic peeling doesn't require special tools or culinary wizardry. Whether you need just one clove for a quick meal or a whole head for a big batch of sauce, knowing how to easily peel garlic cloves will transform your cooking experience from a struggle into a simple, swift step. Say goodbye to sticky fingers and hello to seamless garlic prep!
The Science of Slip: Understanding Why Garlic Peels Easily (or Doesn't)
At its core, peeling garlic is all about one crucial objective: separating the papery skin from the edible clove. Fresh garlic cloves are tightly encased, almost "glued" to their skins, which explains why brand-new garlic can be notoriously difficult to peel. Understanding the underlying principles of why skins detach can help you choose the best method for your specific situation:
- Moisture Levels Matter: Fresh garlic boasts higher natural moisture content. As garlic ages, it gradually dries out. This dehydration causes the clove to shrink ever so slightly, creating a tiny, crucial gap between the clove and its skin. This is why older garlic often peels with remarkable ease compared to its fresher counterpart.
- Friction or Force Helps: Techniques like vigorously shaking cloves in a container or smashing them with a knife work by physically disrupting the bond between the skin and the clove. This force exploits any existing gap, causing the skin to loosen and break away.
- Heat Expands and Releases: Applying heat, whether through microwaving or soaking in warm water, leverages the principle of expansion. Heat causes the skins to dry further and separate from the clove, making them slip off with minimal resistance. It essentially "relaxes" the skin's grip.
- Surface Damage Speeds Detachment: Pressing, crushing, or rolling a clove directly cracks the papery skin. This breaks the adhesive-like bond in multiple places, allowing you to peel away larger pieces of skin rather than fiddling with tiny, stubborn scraps.
By keeping these principles in mind, you can intelligently select a method. For instance, if you're dealing with exceptionally fresh, stubborn garlic, a method involving force or heat might be more effective. Conversely, if your garlic has dried out a bit, even a gentle press could be all you need.
Prepping for Perfection: Choosing & Storing Your Garlic
Before you even think about peeling, the quality and storage of your garlic play a significant role in how easily it will shed its skin and, of course, how it will taste. Opting for good quality garlic means easier peeling and superior flavor in your dishes.
- Choosing the Best Bulbs: Look for garlic bulbs that are plump, firm to the touch, and have dry, intact, tight skins. Avoid any bulbs that feel soft or spongy, have visible sprouts (a sign of older garlic that can sometimes have a bitter taste), or show signs of mold or brown spots. A healthy, fresh bulb promises a more satisfying peeling experience.
- Optimal Storage: Unpeeled garlic should always be stored in a cool, dark place with good air circulation. A mesh bag or an open basket in your pantry is ideal. Crucially, never store whole garlic bulbs in the refrigerator. The cool, damp environment of a fridge actually encourages sprouting and shortens the garlic's shelf life, making it less pleasant to peel and use.
Your Go-To Guide: Tried-and-True Garlic Peeling Methods
Ready to get peeling? Here are the most effective methods, each suited for different quantities and situations. Find the one that works best for you!
1. The Classic Knife Smash: Quick & Mighty
This method is a favorite among professional chefs for a reason: it's incredibly fast and efficient, particularly when you need just a few cloves. It leverages the "friction or force" principle to perfection.
- Separate Cloves: Begin by removing the individual cloves you need from the garlic bulb. You can do this by gently pulling them apart or by placing the bulb on a cutting board and pressing down with the heel of your palm to loosen them.
- Position the Clove: Place one unpeeled garlic clove flat on your sturdy cutting board.
- The Smash: Position the flat side of a heavy chef's knife directly over the clove. With a firm, controlled smack of your palm against the knife's blade, press down sharply. You'll hear a slight crunch.
- Peel with Ease: The skin will have split and loosened, allowing you to easily peel it away in one or two large pieces. Sometimes, the skin practically falls off on its own!
Pro Tip: Ensure your knife is clean and use enough force to crack the skin but not so much that you completely flatten the clove, unless you intend to mince it immediately. This method is fantastic for quickly prepping garlic for mincing or crushing.
2. The Bowl or Jar Shake: Batch Peeling Made Easy
If you're preparing a dish that calls for a lot of garlic, like a rich marinara sauce or a large batch of roasted vegetables, the shaking method is a game-changer. It utilizes sustained friction to separate the skins.
- Break Apart the Bulb: Separate all the cloves from the garlic bulb. Don't worry about peeling them individually yet.
- Into the Container: Place the separated, unpeeled garlic cloves into a sturdy, lidded container. A mason jar, a large metal bowl with another bowl inverted on top, or even two sturdy plastic containers that fit snugly together will work.
- Shake, Shake, Shake!: Secure the lid (or hold the bowls tightly together) and shake the container vigorously for 15-30 seconds. Imagine you're shaking a cocktail or mixing ingredients. The cloves will bang against each other and the sides of the container.
- Reveal the Magic: Open the container. Many of the skins will have completely come off, and the remaining ones will be loose enough to peel away with minimal effort. Discard the loose skins and enjoy your bounty of peeled cloves.
Insider Insight: For particularly fresh or stubborn garlic, a little moisture can help. After step 1, add a tablespoon of water to the container before shaking. The added slipperiness can help dislodge those clingy skins. However, make sure to dry the cloves thoroughly afterward if you're not using them immediately.
3. The Warm Water Soak: Gentle & Effective for Many Cloves
For those who prefer a gentler approach that doesn't bruise the garlic, or if you need to peel a large quantity without the physical exertion of shaking, a warm water soak is an excellent choice. This method relies on heat to expand and release the skins.
- Separate and Soak: Break apart your garlic bulb into individual cloves. Place them in a bowl and cover them completely with warm (not boiling!) tap water.
- Let It Sit: Allow the cloves to soak for about 5-10 minutes. You might notice some skins starting to float to the surface.
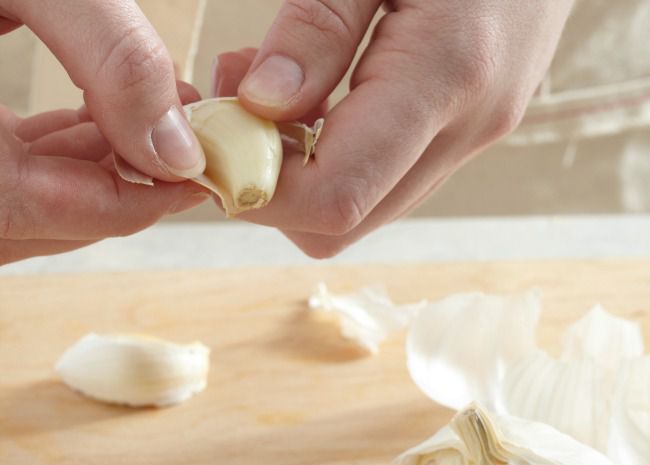
- Peel Away: Drain the water. You'll find that the skins are now incredibly easy to slip off with just a gentle squeeze or pinch. They will often come off in one piece.
Benefit: This method keeps the garlic cloves intact and unbruised, making it ideal if you need whole peeled cloves for roasting or confit. It’s also much cleaner, with less papery mess.
4. Microwave Magic: A Speedy Trick for Single Cloves
When time is of the essence and you only need one or two cloves, the microwave offers an almost instant solution by applying rapid heat.
- Pop in the Microwave: Place an unpeeled garlic clove (or a few) directly into your microwave. No water or container is needed, though you can use a small microwave-safe dish to contain them.
- Short Burst: Microwave on high for just 5-10 seconds. The exact time may vary slightly depending on your microwave's wattage and the garlic's freshness.
- Effortless Peel: Carefully remove the warm clove. The heat will have dried and loosened the skin, causing it to almost instantly slip off. You might even find the root end shrivels and detaches, making it even easier.
Caution: Don't overdo it! Microwaving for too long can start to cook the garlic, making it rubbery and altering its flavor. Stick to very short bursts. This technique is fantastic for when you're in a hurry and just need a quick garlic fix. You can find more methods and insights to skip the struggle with easy garlic peeling methods for less mess.
Advanced Tips & Troubleshooting for Seamless Garlic Prep
- Dealing with Stubbornly Fresh Garlic: If you have very fresh garlic that resists even the best methods, a combination approach often works. Try a quick 5-second microwave burst, then immediately follow up with the knife smash. The initial heat loosens, and the smash finishes the job.
- The Green Sprout: Sometimes, especially with older garlic, you'll find a green sprout in the center of the clove. While edible, some people find it can add a slightly bitter taste. If desired, simply cut the clove in half lengthwise and remove the sprout with the tip of your knife.
- Silicone Peeling Tube: For those who love kitchen gadgets, a silicone garlic peeling tube is a small, inexpensive tool that works wonders. Simply place a few cloves inside and roll it firmly on the countertop. The friction inside the tube efficiently removes the skins.
- Prep Ahead: If you frequently use garlic, consider peeling a larger batch using the bowl shake or warm water soak method. Store the peeled cloves in an airtight container in the refrigerator for up to a week. For longer storage, you can lightly coat them in olive oil before refrigerating or freeze them.
Embrace the Flavor: Your Garlic Peeling Journey Starts Now!
No longer should the thought of peeling garlic fill you with dread. With these proven techniques and a little understanding of how garlic behaves, you can transform a once-tedious task into a quick, effortless step in your cooking process. Experiment with each method to find your personal favorite, and soon you'll be adding that indispensable garlic flavor to all your dishes with newfound confidence and ease. Happy cooking!
